Your Own Homelab & Virtualized Workstation Using Proxmox VE and a Threadripper Machine

It has been so long since I have blogged about open source technologies and I feel thirsty after finally getting to have a bit of “me time” during EID Al Adha Holidays (Eid Mubarak everyone reading this post), also for the last 2 years was a bit focused on learning Azure related technologies, especially Azure IoT so didnt get a lot of time to mess around with my homelab or upload videos and blog in general.

Long ago at end of 2019, I built my homelab machine that had an AMD Threadripper 1950X CPU with 16 Cores / 32 Threads and 128GB Ram, 20TB raidz1 Storage (OpenZFS) & 3 GPUs, one RX550 for the bare-metal OS which is in my case is Proxmox’s Debian Distribution, one GTX1080ti passed through to the Windows Virtual Machine I usually use as my workstation and still running solid and upgraded to windows 11 with virtualized TPM 2.0 chip virtualization support using Proxmox VE 7! The last one is a Quadro GPU passed through to another windows VM for Video Encoding Applications such as multimedia streaming and surveillance.
https://marketresearchtelecast.com/proxmox-ve-7-1-seamlessly-virtualize-windows-11-and-tpm-2-0/207313/

below diagram illustrates the build
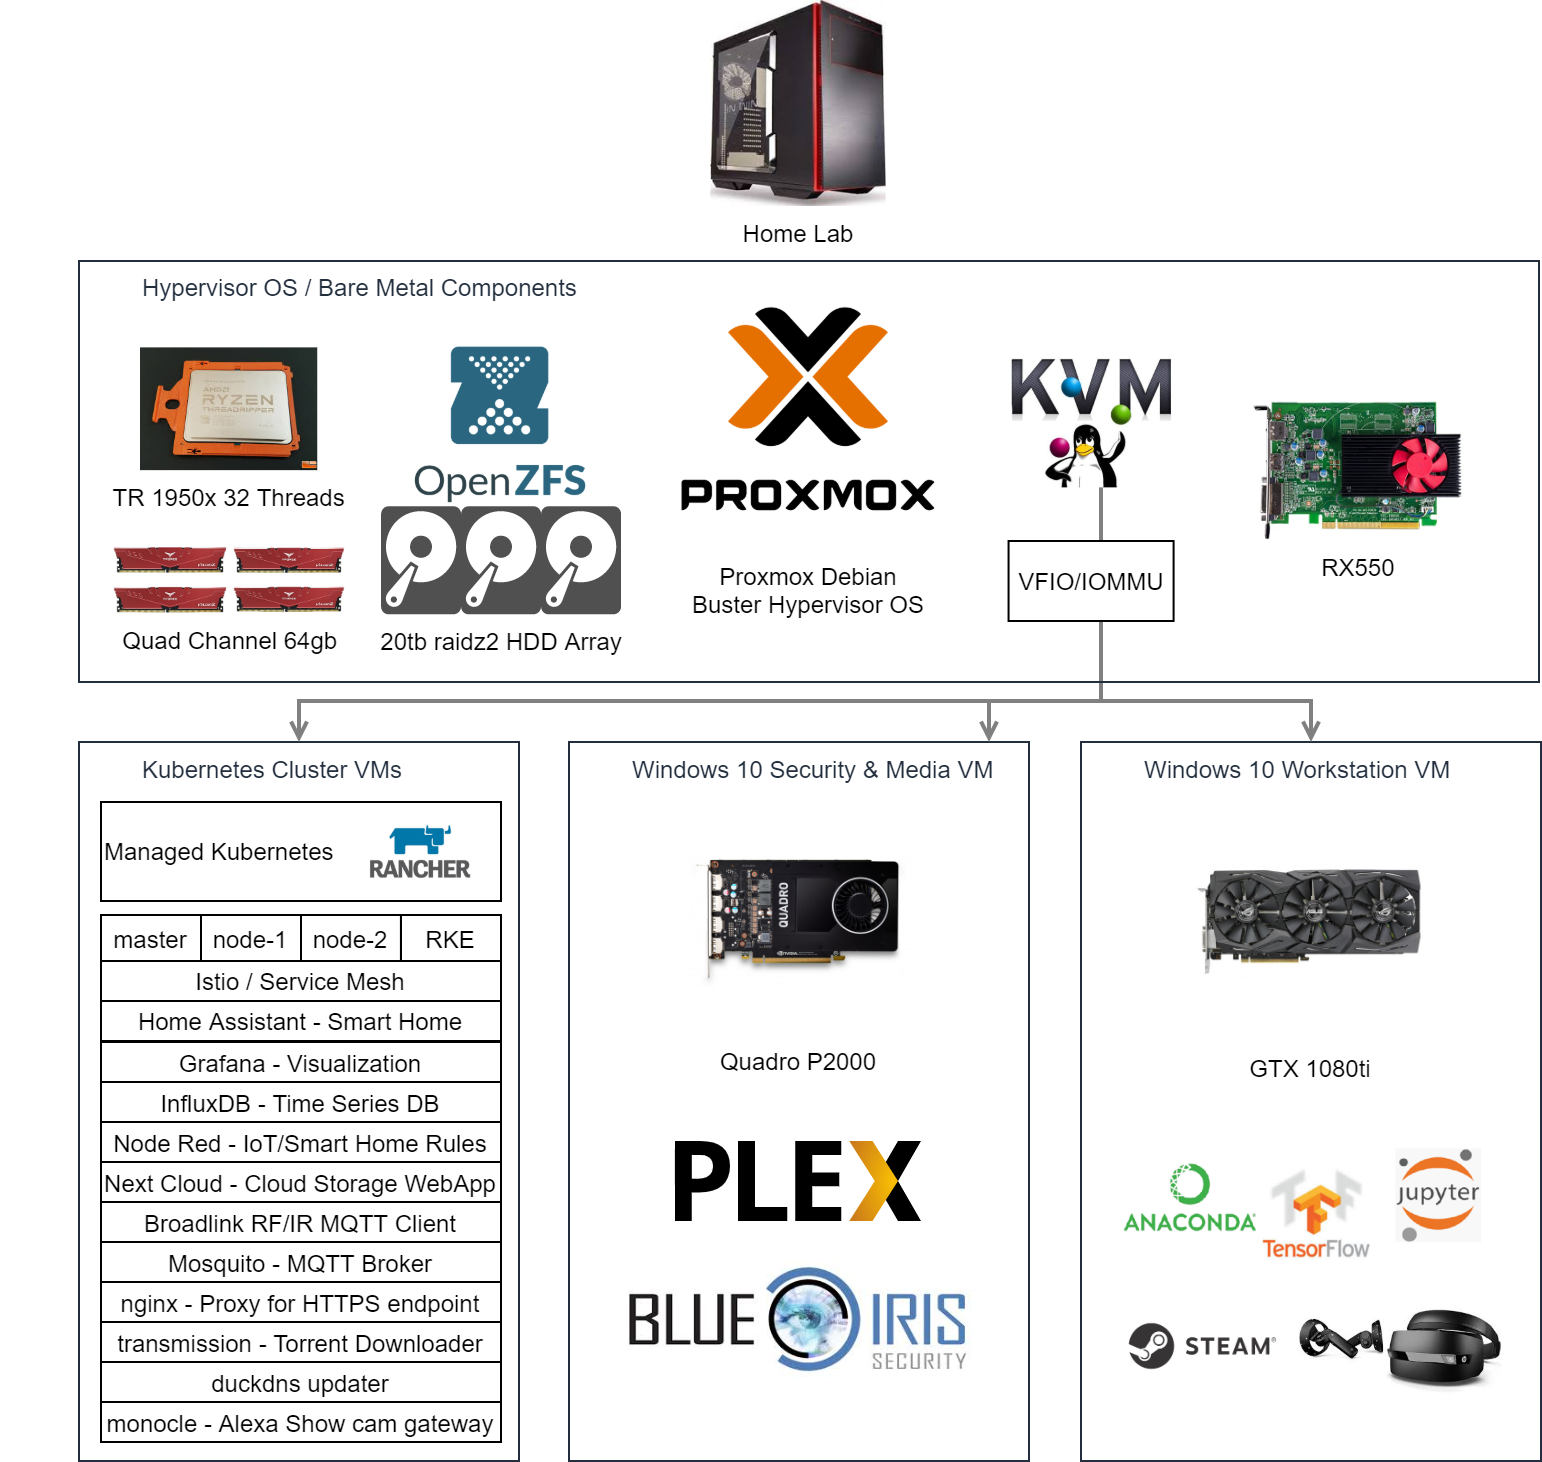
Homelab Diagram

in terms of networking, I have a thinkclient running pFSense as my router and connected to my eLife connection with dynamically allocated IP being updated to CloudFlare and hidden/proxied in cloudflare, this topic alone will leave it later to go through its details

These specs are far from what you need if you just want a workstation, but instead I was thinking to consolidate all my home compute and storage workload for smarthome (Homeassistant) and multimedia (Plex), Security Cameras (blueiris) and other useful home applications like nextcloud in a single machine. Plex and Blueiris are running on a 2nd windows virtual machine other than the workstation machine that has GTX1080ti, it instead has Quadro P2000 Passed through for NVENC to do its magic in saving CPU resources for multiple video streams encoding (Quadro allows you to encode more than 2 streams “around ~20 Full HD for P2000″, unlike consumer cards which are hard limited to 2). And on top of that, the same machine will be my own workstation, I had thoughts of creating 2 workstations using the same machine but I decided not to do so. Moreover this machine have helped me discover a lot of great opensource projects that are practical for work in general like rancher and nodered. perhaps in the future my setup will be Highly Available with another hardware Node just because :D. or maybe ill open another home for Disaster Recovery XD.

Building and operating your homelab at home opens a lot of possibilities to learn emerging technologies and slowly train your linux ninja skills. running and operating your own hardware down to the hypervisor management is a totally different story than operating on the cloud, where all your needed resources are just a click away. I want to get my hands more dirty and go through all the trouble of operating my own private cloud, because why not!

I have uploaded the first part of my series of videos for building the homelab in below link,

and the second part is uploaded today after the raw unedited video material was buried for about 2.5 years. even though the material is a bit old, but it is still quite relevant, heck it is more relevant now after the news coming out about VMWare in final stages of being acquired by broadcom, moreover broadcom CEO is leaving for another job today :D (My opinions are my own, VMWare is a great company, but with the new changes it seems wise to explore other hypervisors, especially KVM based).
https://www.theregister.com/2022/07/11/mastermind_of_broadcoms_vmware_buy/

The first part of the video showcases the outcome of achieving a GPU performance with GPU passed through to VM almost identical to having that same GPU running on the machine bare metal.

The remaining parts walk through the installation and configuration to achieve this result.

the Main topic of this second video is how to passthrough a consumer GPU (GTX1080ti in my case) to a virtualized windows host running within the proxmox KVM based hypervisor. the topic is quite niche and it was really fun to troubleshoot the issues and find solutions and workarounds for the nvidia driver being blocked due to not being an “Business Grade” GPU (the infamous Nvidia Code 43 Error), however as far as I know, this driver lock has been already bypassed by nvidia themselves so you might not fall into such troubles being faced in the video while passing through an NVidia GPU to your VM.

In the below Github Repository Ill be updating the configuration files to help you on your journey to building your own homelab if you would like to follow the same path.

https://github.com/alsolh/homelab

Happy homelabbing :D, and I hope that Ill be returning back to my old hobby again because I really need to be up to date with the market changes and opensource technologies revolutionizing the market and IT industry.

How to fix your zfs pool after /dev/sdx name have changed

if you have created your zfs pool earlier using /dev/sdx name instead of /dev/disk/by-id/xxx then you might face an issue if the dev name changed and you try to replace the drive with itself using the new OS generated name under /dev/sdx, similar to below error:

alsolh@server:~/diskmanagement$ sudo zpool replace -f tank 53495565608654595 /dev/sdc1
invalid vdev specification
the following errors must be manually repaired:
/dev/sdc1 is part of active pool ‘tank’

alsolh@server:/dev/disk/by-id$ sudo zpool replace -f tank 53495565608654595 /dev/disk/by-id/ata-WDC_WD100EMAZ-00WXXXX_1EGGXXXX-part1
invalid vdev specification
the following errors must be manually repaired:
/dev/disk/by-id/ata-WDC_WD100EMAZ-00WXXXX_1EGGXXXX-part1 is part of active pool ‘tank’

to solve this issue, referring to both articles below:

https://unix.stackexchange.com/questions/346713/zfs-ubuntu-16-04-replace-drive-with-itself
https://plantroon.com/changing-disk-identifiers-in-zpool/

first to avoid having this issue in other drives run below command

zpool export tank
zpool import -d /dev/disk/by-id/ tank

if you have proxmox, you need to comment out these lines before running zpool export

alsolh@server:/dev/disk/by-id$ sudo nano /etc/pve/storage.cfg

dir: local

path /var/lib/vz
content backup,iso,vztmpl

lvmthin: local-lvm
thinpool data
vgname pve
content rootdir,images

#zfspool: tank
# pool tank
# content rootdir,images
# mountpoint /tank
# nodes server

then run below commands under interactive root and replace sdx1 with your disk new generated name that needs to be fixed, this will clear the disk that have changed its name from its assignment to the zpool

alsolh@server:/dev/disk/by-id$ sudo -i
root@server:~# dd bs=512 if=/dev/zero of=/dev/sdx1 count=2048 seek=$(($(blockdev –getsz /dev/sdx1) – 2048))
root@server:~# dd bs=512 if=/dev/zero of=/dev/sdc1 count=2048

now find out what is the device new name with below command

alsolh@server:/dev/disk/by-id$ cd /dev/disk/by-id
alsolh@server:/dev/disk/by-id$ ls

sample correct name is “ata-WDC_WD100EMAZ-00WXXXX_1EGGXXXX-part1″ or the world wide name “wwn-0x5000cca27ecxxxxx”

now replace your drive that had the issue by itself with below command:

alsolh@server:/dev/disk/by-id$ sudo zpool replace -f tank 53495565608654595 wwn-0x5000cca27ec6xxxx

or

alsolh@server:/dev/disk/by-id$ sudo zpool replace -f tank 53495565608654595 /dev/disk/by-id/ata-WDC_WD100EMAZ-00WXXXX_1EGGXXXX-part1

now you will see your pool is re-silvering which indicates that you have done the replacement successfully

alsolh@server:~$ sudo zpool status -v
pool: tank
state: DEGRADED
status: One or more devices is currently being resilvered. The pool will
continue to function, possibly in a degraded state.
action: Wait for the resilver to complete.
scan: resilver in progress since Fri Aug 7 18:37:09 2020
6.09T scanned at 1.76G/s, 1.84T issued at 547M/s, 14.6T total
356G resilvered, 12.60% done, 0 days 06:48:55 to go
config:

NAME STATE READ WRITE CKSUM
tank DEGRADED 0 0 0
raidz1-0 DEGRADED 0 0 0
wwn-0x5000cca267dbxxxx ONLINE 0 0 0
wwn-0x5000cca267f2xxxx ONLINE 0 0 0
replacing-2 DEGRADED 0 0 0
53495565608654595 UNAVAIL 0 0 0 was /dev/sdd1
wwn-0x5000cca27ec6xxxx ONLINE 0 0 0 (resilvering)

errors: No known data errors

AN ASSESSMENT WIKI FOR INTERNET OF THINGS

This is my first publication done with my classmates in the American University of Sharjah. it is about an integration between an assessment wiki and multiple sensors connected to an arduino board that sends the telemetry to a raspberry Pi board then the integration is done through a message oriented middle-were called openfire through the XMPP protocol the outcome of this implementation is that contributors to the wiki can write questions that includes sensor readings from the physical world and users can answer questions that dynamically change the answers based on the readings from the sensors, below is the paper citation.

http://library.iated.org/view/ZUALKERNAN2014ANA2

Introduction to Internet Explorer Browser Automation

Browser automation, this technology seemed like black magic or forbidden for some, but it may be your last resort of integration (not really an integration) if there is no interface to integrate with the web application you need to interact with and exchange information. for many years it was my favorite resort for quick wins and workaround solutions for many issues, to list a few:

  • You have a list of thousands of data entry rows you need to update to a web form
  • You have an application that needs to automatically type data to a web page and submit it in a macro style function
  • You need to retrieve data from thousands of pages and compile them in one tabular format
  • You need to create your own web SSO application

The list is not limited to the above but can be endless in terms of quick win solutions. some companies offer you frameworks to purchase that does this black magic for you but I need to make a point that it is too simple and easy to perform that you don’t need to rely on a specific framework to do it for you.

I am going to concentrate on IE automation due to the reason that most enterprise environments rely (unfortunately) on internet explorer to run their applications, even some web applications only run on IE. I will be writing a different guide for using the Selenium framework in java that is more suited for Firefox automation although it also has IE drivers to run automations on.

Some say why do you have to do it in IE, why not use the webbrowser control from the .Net framework? a simple answer is that the webbrowser control is limited and does not offer the complete features of running web applications on it, say for example running an activex, or making some SSO (Single Sign On) applications that also does automation to work with the application you are going to write for your desired automation, additionally it will offer the user the same experience of a native web browser which is a huge advantage.

Follow these steps and you will have the key to begin automating your tasks in internet explorer using .Net framework:

In the below example we are going to automate google.com to search for a specific term that the user will enter in your application.

  1.  Create a windows forms (or console if you desire) project in visual studio (windows forms is used for simplicity)
  2. add reference to Microsoft internet controls (shdocvw.dll) step2
  3. import shdocvw to the windows form class
    using SHDocVw;
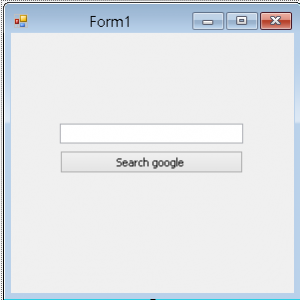
  4. add a button and a textbox to your form step4
  5. Create a new object that contains the internet explorer instance at the class level and create a Boolean variable to trigger automation when desired and a string variable to pass to the document complete event to avoid cross thread exception in your debugging environment
            //Create a new object that contains the internet explorer instance
            InternetExplorer iExplorer = new InternetExplorer();
            //Create a boolean variable to trigger automation when desired
            bool doAutomation = false;
            //Create a string variable to pass to the document complete event
            string searchTerm = "";
            
  6. add the following code to the form load event to make the internet explorer instance visible and add a handler to the document complete event of the webbrowser, the document complete event is the event that fires when the page is completely loaded in the browser (except for ajax loads)
    private void Form1_Load(object sender, EventArgs e)
            {
                //add a handler to the document complete event in internet explorer
                iExplorer.DocumentComplete += iExplorer_DocumentComplete;
                //Make the internet explorer instance visible
                iExplorer.Visible = true;
            }
            
  7. add the following code to the button click event to navigate to a desired URL, set the search term variable from the input text box and trigger the automation by setting the Boolean variable assigned to true:
    private void button1_Click(object sender, EventArgs e)
            {
                //Set a flag to do the automation
                doAutomation = true;
                //Set the search term from the input textbox in the form application
                searchTerm = textBox1.Text;
                //Navigate to a URL like google
                iExplorer.Navigate("https://www.google.ae/");
            }
            
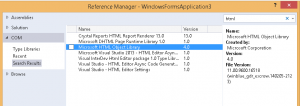
  8. add reference to the Microsoft HTML object library step8
  9. import mshtml to the form class:
    using mshtml;
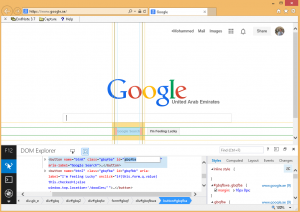
  10. go to internet explorer developer tools (press f12) and search by clicking on the elements you want to automate and get their IDs, in our case, the google search input id is “q” and the search button id is “gbqfba” step10
  11. add the following code the browser complete event, the code is commented and you can understand how it works from the comments
    void iExplorer_DocumentComplete(object pDisp, ref object URL)
            {
                //check if the desired URL is loaded & automation is triggered
                if (URL.ToString() == "https://www.google.ae/" && doAutomation)
                {
                    //reset the automation trigger to avoid automation when not required
                    doAutomation = false;
                    //cast pDisp to an internet explorer variable
                    InternetExplorer iEplorerDOC = (InternetExplorer)pDisp;
                    //get the document object from the internet explorer instance
                    mshtml.HTMLDocument doc = iEplorerDOC.Document;
                    //get the search input element from the document object by ID
                    mshtml.IHTMLElement searchElem = doc.getElementById("q");
                    //set the search value to the desired term by setting the attribute of the input textbox of google to any value
                    searchElem.setAttribute("value", searchTerm);
                    //get the search button object from the document loaded
                    mshtml.IHTMLElement searchBtn = doc.getElementById("gbqfba");
                    //invoke the click command to simulate the onclick method of the element in the document loaded in the browser
                    searchBtn.click();
                }
            }
            
  12. Run the application, input your search term then press the search button to observe the black magic (see how simple was that!)
    step 12

Below is the full code example:

using System;
using System.Collections.Generic;
using System.ComponentModel;
using System.Data;
using System.Drawing;
using System.Linq;
using System.Text;
using System.Windows.Forms;
using SHDocVw;
using mshtml;

namespace WindowsFormsApplication3
{
    public partial class Form1 : Form
    {
        //Create a new object that contains the internet explorer instance
        InternetExplorer iExplorer = new InternetExplorer();
        //Create a boolean variable to trigger automation when desired
        bool doAutomation = false;
        //Create a string variable to pass to the document complete event
        string searchTerm = "";
        public Form1()
        {
            InitializeComponent();
        }

        private void Form1_Load(object sender, EventArgs e)
        {
            //add a handler to the document complete event in internet explorer
            iExplorer.DocumentComplete += iExplorer_DocumentComplete;
            //Make the internet explorer instance visible
            iExplorer.Visible = true;
        }

        void iExplorer_DocumentComplete(object pDisp, ref object URL)
        {
            //check if the desired URL is loaded & automation is triggered
            if (URL.ToString() == "https://www.google.ae/" && doAutomation)
            {
                //reset the automation trigger to avoid automation when not required
                doAutomation = false;
                //cast pDisp to an internet explorer variable
                InternetExplorer iEplorerDOC = (InternetExplorer)pDisp;
                //get the document object from the internet explorer instance
                mshtml.HTMLDocument doc = iEplorerDOC.Document;
                //get the search input element from the document object by ID
                mshtml.IHTMLElement searchElem = doc.getElementById("q");
                //set the search value to the desired term by setting the attribute of the input textbox of google to any value
                searchElem.setAttribute("value", searchTerm);
                //get the search button object from the document loaded
                mshtml.IHTMLElement searchBtn = doc.getElementById("gbqfba");
                //invoke the click command to simulate the onclick method of the element in the document loaded in the browser
                searchBtn.click();
            }
        }

        private void button1_Click(object sender, EventArgs e)
        {
            //Set a flag to do the automation
            doAutomation = true;
            //Set the search term from the input textbox in the form application
            searchTerm = textBox1.Text;
            //Navigate to a URL like google
            iExplorer.Navigate("https://www.google.ae/");
        }
    }
}

XMPP vs MQTT-SN for IoT Applications

XMPP vs MQTT-SN

In a class I am attending for Dr.Imran Zulkernan for advanced internet computing we were discussing a very interesting topic for message oriented middle-wares using both publish subscribe and request response mechanisms, we were assigned an exciting homework to compare both XMPP & MQTT-SN middle-wares for use in IoT applications. I wanted to share the results and hope that it may come in handy for your decision if you are interested in this topic.

MQTT-SN: Message Queuing Telemetry Transport (MQTT) is an open pub/sub protocol. MQTT-SN is an extension of the open publish/subscribe protocol designed for constrained devices used in telemetry applications. [2]

XMPP: Extensible Messaging and Presence Protocol (XMPP), which is standardized by the IETF and widely deployed for real-time data stream and Instant Messaging (IM) applications. XMPP itself is a set of flexible and open XML technologies that are expandable by protocol extensions (XEPs) to adopt to various environments
and scenarios. [1]

Criteria XMPP MQTT-SN
Suitable for Devices with limited ROM resources Has a modified version called uXMPP which has reduced functionality & the output code is around 12.21 kb Full implementation is 12 kb but it can be reduced further by implementing predefined topic IDs
Addressing Single Devices The devices can be directly addressed and messages can be identified from by the jabber ID of the device Devices are publishing topics and only the broker identifies the device for QOS reasons but the subscriber doesn’t get the device id by default, rather the subscriber get the topic contents aggregated from one or multiple devices
Addressing Multiple Devices XEP implementation XEP-0045 can help in addressing multiple devices using a chat room, but these chat rooms cannot be addressed in a hierarchal fashion. If we need devices in the same floor they all need to be in a chat room, and if these same devices needs to be grouped to include all the building these devices need to be also joined to a different chat room including all devices in the building Devices are publishing topics and topics can be addressed in a hierarchal fashion, there are wildcards supported that can select multiple topics such as multiple room temperatures for a certain floor and room temperatures for the whole building
Actuator Control Device can be identified by jabber id and control message can directly reach the destination device Device needs to be subscribed to a control topic and the control message needs to be published to the same topic
Main Method for providing readings Based on the event of receiving a message, but can be extended to publish-subscribe with XEP-0060 Polling where the device needs to continuously provide readings to the subscriber within a certain time interval & can be based on certain conditions. A workaround can be done by making the device subscribe to a topic and publish based on a message received from a topic
Data exchange format XML Stanzas, where the device can publish multiple attributes along with headers but it will add additional overhead in the message packet Content can be stored in the packet for the topic in any format and can be very lightweight
Failover mechanisms uXMPP is using the XEP standard XEP-0174 Serverless Messaging via Multicast DNS (mDNS) and DNS Service Discovery

(DNS-SD) for directly sending messages to the device without an XMPP server which is a failover mechanism in case the XMPP server is down

In MQTT-SN the device has to communicate with a gateway and a broker for the topic to reach the subscriber, no backup mechanism presented
Power saving XMPP can make the device wake up for many times unnecessarily when requesting for data, the extension XEP-0060 can help in resolving that and making it join a chatroom MQTT-SN can help the device stay in sleep mode and publish only in certain conditions without being invoked to wake up and send data
Changing devices XMPP gets affected when changing devices because the new jabber id needs to be configured, the dynamic and up-to-date roster is a workaround to overcome this limitation As the devices publish topics, the subscriber doesn’t care if the device changed because the topic will remain the same
QoS Not available by default but can be added Handles QoS and has 3 levels
Security XMPP supports TLS/SSL, but uXMPP doesn’t currently support it Security is not available in the standard but the messages can be encrypted
Scalability XMPP can be scalable by extending the XMPP server to multiple servers connected together where the message can travel from one server to another Scalability is limited by the number of devices that can be connected to the gateway and the number of gateways that can be connected to the broker

Type of applications suited for XMPP:

  • Actuator networks where identifying each device by its address rather than the topic is important to send control signals to the device.
  • Scenarios where the middleware is not reliable and failover mechanism is required
  • Simple Human-Machine interaction where the human can type control messages to get the required data such as sending a query to a certain device to get the current image of the connected camera.
  • In Feature rich IoT applications such as home automation XMPP is suitable due to the available XEPs that extend the protocol
  • Applications where network is stable and QoS is not very important
  • Applications where integrations with third party solutions from different vendors are required, as XMPP relies on XML as a messaging format, third party solutions can easily adapt to it
  • Applications where security is a concern and TLS/SSL standards needs to be followed
  • When the IoT device has many readings and actuator functionality where they can be easily addressed by the XML format where in XMPP it is the standard and only format, applications similar to getting readings from smartphones where it has multiple sensors where the data can be easily expressed in XML

Type of applications suited for MQTT-SN:

  • Large number of temperature sensors distributed in rooms across different buildings for HVAC control, due to the publish-subscribe mechanism which is mostly suitable for this application
  • Highly constrained devices with limited power that communicate over low bandwidth network
  • Fleet management where the subscriber can subscribe to topics sending GPS locations of grouped devices and monitoring their location on certain interval
  • Applications where the scope is limited such as getting temperature readings for an area
  • Applications where the network quality and performance is low and failures are high, QoS in MQTT-SN helps manage the arrival of messages
  • Suitable for smart-grid applications for getting meter readings from homes where the meters have very limited processing powers
  • Applications such as fire alarms where the sensor needs to be sleeping most of the time and will send readings based on a certain event

References:

[1] Klauck, R.; Kirsche, M., “Chatty things – Making the Internet of Things readily usable for the masses with XMPP,” Collaborative Computing: Networking, Applications and Worksharing (CollaborateCom), 2012 8th International Conference on , vol., no., pp.60,69, 14-17 Oct. 2012

[2] Hunkeler, U.; Hong Linh Truong; Stanford-Clark, A., “MQTT-S — A publish/subscribe protocol for Wireless Sensor Networks,” Communication Systems Software and Middleware and Workshops, 2008. COMSWARE 2008. 3rd International Conference on , vol., no., pp.791,798, 6-10 Jan. 2008

http://www.iotprimer.com/2013/11/iot-protocol-wars-mqtt-vs-coap-vs-xmpp.html
http://stackoverflow.com/questions/7129821/mqtt-vs-xmpp-which-should-i-choose

Microsoft Workflow Foundation

This is my first sort of training video :P, it shows you how to work with flowchart implementation in the workflow foundation 4 framework in visual studio 2010. I have done it as part of an assignment last semester to show a practical use of State Machine and Dataflow Diagrams. An example was taken which was the Inres Protocol and specifically the SCP implementation, hope you like it, please let me know in the comments if would like more videos similar to this one and if you would like the source code and presentation

Requirements:
Microsoft Visual Studio 2010 SP1 or later

https://www.dreamspark.com/Student/Default.aspx

http://www.microsoft.com/en-us/download/details.aspx?id=23691

.Net framework 4.0.1 (both designer and runtime updates)

http://www.microsoft.com/en-us/download/details.aspx?id=608

http://www.microsoft.com/en-us/download/details.aspx?id=11705

http://www.microsoft.com/en-us/download/details.aspx?id=8483